Friday, December 11, 2009

Finishing up the work in progress

This is a conjoined bowl -- I tried to make 2 identical bowls that I "glued" together and the put a cute little handle on it. The piece was glazed in Shaner White and Josh Green -- see how the green becomes reddish/purplish when it interacts with the white? I also put some coal ash inside the piece so that it would run a little more. I really like this piece but it is a gift and, so, no longer available.


This is the same form that I made at the beginning of the session. A cylinder with handles and slip. The piece is then fired and then I painted the piece with a more asian insipired motive using wax and the glaze the piece in Antique White and Waxy White in bands around the outside. The inside is Tenmoku.

This is another Salt Pig (see earlier post). This is probably the thinnest one I have thrown and I am really happy with it. I glazed the outside with Shaner White over Coleman Apple Green. I've used this combination before (see the pedestal plate) but the way this piece turned out is in no way consistent with the other piece. Instead of having that running effect as on the plate, this piece actually has pitted and little nips on the surface. Touching the piece is really addictive, you can't stop touching it once you've start!

Another Salt Pig -- I am really enjoying making these. They are fun and I get to practice a few different form. I first start out with a cylinder and then collar it into a form of a bottle and then finally closing in the form completely. This piece is a little thick and I really have to work on thinning out the wall and maximizing the clay more. This piece was glazed in Shaner White with Celadon brushed on with a Chinese Calligraphy brush. I also put some coal ash on the piece but it doesn't seem to have any effect. Maybe the coal ash needs to be on thicker.

This is the plate echo to the "lotus" cup that I made (see earlier post). Same color and same glazing technique. I think I am going to try White over Blue next time instead of Blue over White.

This is the biggest bowl I've made to date and -- can you believe it -- I only used 2 lbs of clay. The bowl, unfortunately, got a little wonky in the glazing process but I still like it very much. The glaze on the outside is Shaner White with Celadon over it. The Celadon coloration is much more subtle with the white under it. I also slip trailed the edge and it is coming up a little blueish. The inside is just Lustre Shino and I really like how the glaze crackle.

Wednesday, November 25, 2009

End of Another Session

10 weeks have flown by and I am done with my first official beginner's pottery class. Previously, I have taken 2 sessions (4 weeks) of First Time Pottery and this is the official 10 weeks Beginner's Potter class. I still have some pieces that needs to be fired and then glazed so I will have some stuff to tie me over until the new year. This time around, there are some real keepers.


I made a wind chime using a cyclindrical shape with the belly pushed out. Everything is done with stoneware; including the hammer and the wind catcher. The only thing that is store bought is the chain to connect everything together. Given that it is stoneware and I am a beginner, it is a little thick and heavy and the sound is not too crisp. I will probably make another next year and try to make it thinner or use porcelain when I learn how to handle it. The piece is glazed in Luster Shino with Aviva Blue brushed on with a chinese brush. The details show the crackling effect of the Luster Shino, which I LOVE!


This mug I made for my brother. It is soda fired and I only glazed the inside and the lip with Yellow Salt. All the other colors you see on the outside are either flashing from the kiln or soda deposit. I really love it and would want to try a soda class in the future.


Yes, yes, I made yet ANOTHER BOWL. What can I say -- I love the bowl form. This one I had Woodland slip applied to the outside in a grid patter when the bowl was still leather hard and it was fired to the bisque state together. I then painted each square in the grid; alternating between Coleman Apple Green and Celadon. The inside I just dipped in Temoku. Notice that my skills at trimming foot ring has improved? It is more even now but I am working towards getting a gentle curve on the foot ring.


This is a small creamer jug that is suppose to be part of a set but I haven't gotten around to making the sugar bowl yet. Nothing special with the glazes -- just Matt Black with Waxy White. Notice that the handle is white with a black strip and it is not like the top half of the creamer -- which is just Matt Black. Took a bit of creativity on my part to get that effect. If you like to know how it is done, contact me. A hint -- resist.


This piece got quite a bit of buzz going around the studio. It sat on the shelf for a little bit before I could collect it and everyone was commenting on how sweet the cup looks and that the glaze was very suitable for the form. Well, I made it but it wasn't really my idea. It was an embellishment of the bowl that my instructor made. I trimmed the foot ring and gave it a double foot and glazed it with Aviva Blue over Shaner White over Iron Red. It is quite sweet and I really like it but I think nex time I am going to have Shaner White over Aviva Blue instead.


Finally, the piece that is, quite possibly, my favorite piece so far. The pedestal plate. Everyone in class loved it too. It is actually made in two pieces (the plate and the foot) that I joined. Then I decorated with cookie cutters and my needle tool before bisque firing. It is glazed with Coleman Apple Green over Celadon and then Spudomene over Coleman Apple Green and the I "drizzled" blue stain on one side.

As always, comments and criticism welcomed!

Monday, November 2, 2009

Salt Pigs

This is a series of three Salt Pigs that I made in pottery class. Salt pigs are used to hold table salt at the dining table in place of a salt shaker. You can also use it next to the stove to hold the salt for salting whatever you're cooking. I did some research into the function of a salt pig and something that I found out was that the inside of a ceramic salt pig should not be glazed so that the clay can absorb the moisture and prevent the salt from clumping. So, all these pieces are unglazed on the inside. I basically made a bottle shape and slowly collared the neck until it is closed off. Two of the salt pigs, I cut an access hole into the side to access the salt and the third one is a lidded form.


This is the lidded form. As you can see, the inside is unglazed. Again, I threw a bottle form that is closed off and has a knob at the top to lift the lid off. I glazed this piece in Temoku and Yellow Salt using a sponging technique.


The technique is the same on this piece and I glazed it in Aviva Blue and Josh Blue using tape and wax resist.


This final one is the smallest of the three and was also the first piece that I threw. Maybe that was why it is the smallest. In any case, this piece was glazed in Waxy White and Celadon.

Thursday, October 29, 2009

The New Class

Yes, I've been missing for a while but with nothing to show -- there's really not a lot of telling to do. LOL. In any case, the new pottery class started on September 19 and I've been busy but I am also more selective now with the pieces I choose to keep. There's only so much storage space available. I've also started numbering my pieces -- yes, yes, I know -- TYPE A. But after a while, a bowl is a bowl is a bowl and I can't duplicate a glaze combination if I can't find the combination in my notebook for it so it I thought it would be easier to just number the pieces. So far, it's working out quite well. In any case, here are the first batch that came out of the glaze kiln:

This piece is a mug measing about 3.25 inches tall and about 3 inches wide. I dipped the whole piece in Josh Green and then Matt White on a bias. Well, the Josh Green turned sort of brown and the Matt White turned sort of purple. Don't know what is going on but maybe will try to duplicate just to see if it is a fluke.


A cyclinder that I tried to embellish by giving it a belly but I didn't like the way it looked so I decided to cut the heck out if it. Cut the top so that it now has a swooping slope and then cut out part of the body to make it more like a candle holder. The "webbing" looked kinda thick when I was done but it shrank during firing so they appear much more delicate now. Dipped the bottom in Waxy White, the top in Temoku (always thought that Temoku is actually Tenmoku 天目 -- confirmed it with a Japanese school mate) and just the rim in Yellow Salt.

Some time in the future, I am actually going to make a piece and cut it all the way down to the bottom.

Another mug -- this one is about 3.75 inches tall and about 3 inches wide. Notice the body? I was going to do the same thing with the above candle holder but it turned out better on the mug. In any case, this one was dipped in Waxy White and I attempted to brush Lavendar into the grooves but it ran during firing. I didn't mind too much -- I've always loved the drip pattern. Very natural and you can't really duplicate it -- which makes each piece one of a kind.


I was running out of idea of what to do with this piece (3 x 3 inches) so I thought I would do something simple. It happens when you glaze 7 pieces at the same time. So, I decide to try a glaze that I've never used before. I glazed the whole piece in Luster Shino and then put a bunch of X's and O's on the surface in Aviva Blue. Turned out that I really liked the piece -- the Luster Shino actually has a crackle effect -- something that I've been trying to do with Celadon. Yea! You can sort of see it in the picture but you might have to click on it to enlarge it.


This next one is more like a tea cup then a mug as it is smaller (3 inches tall and about 4 inches wide). This piece is done in my favorite combination -- Temoku and Yellow Salt. Instead of dipping or brushing though, I had the two glazes sponged on. The effect is quite interesting -- there are some places that are shiny and other places that are more matt. I really can't go wrong with the combination -- whether dipped, brushed or sponged. There's also the signature drippage that is classic Temoku/Yellow Salt.


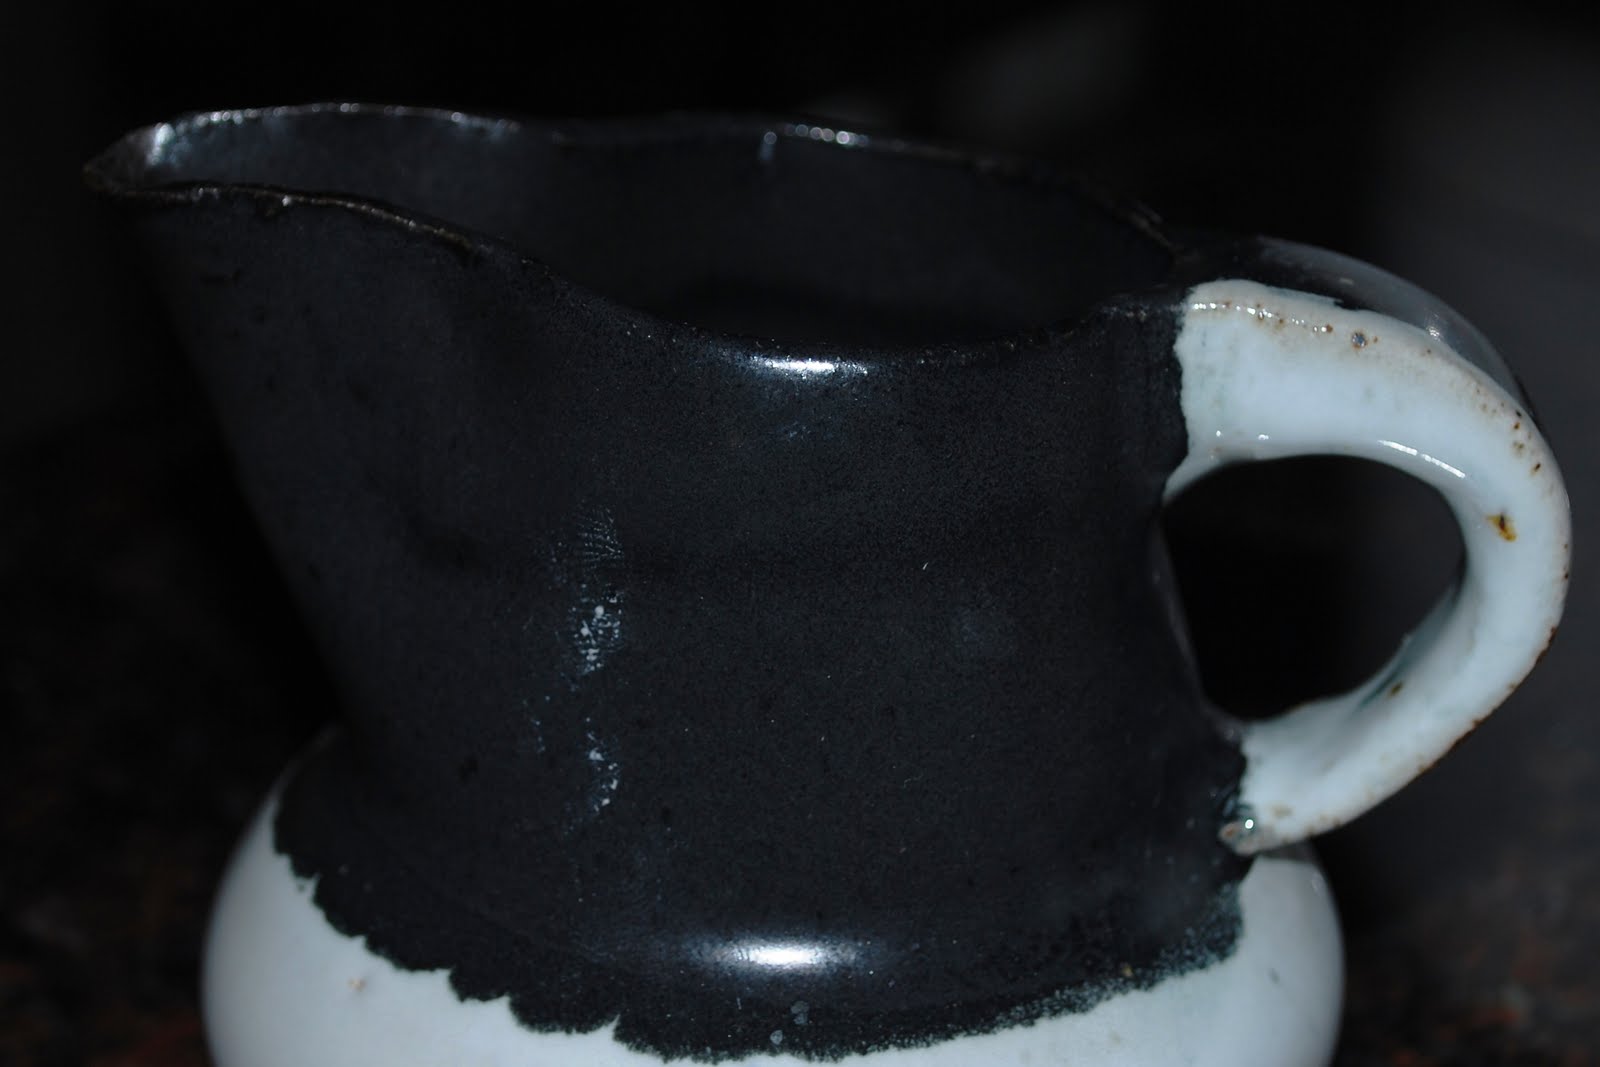
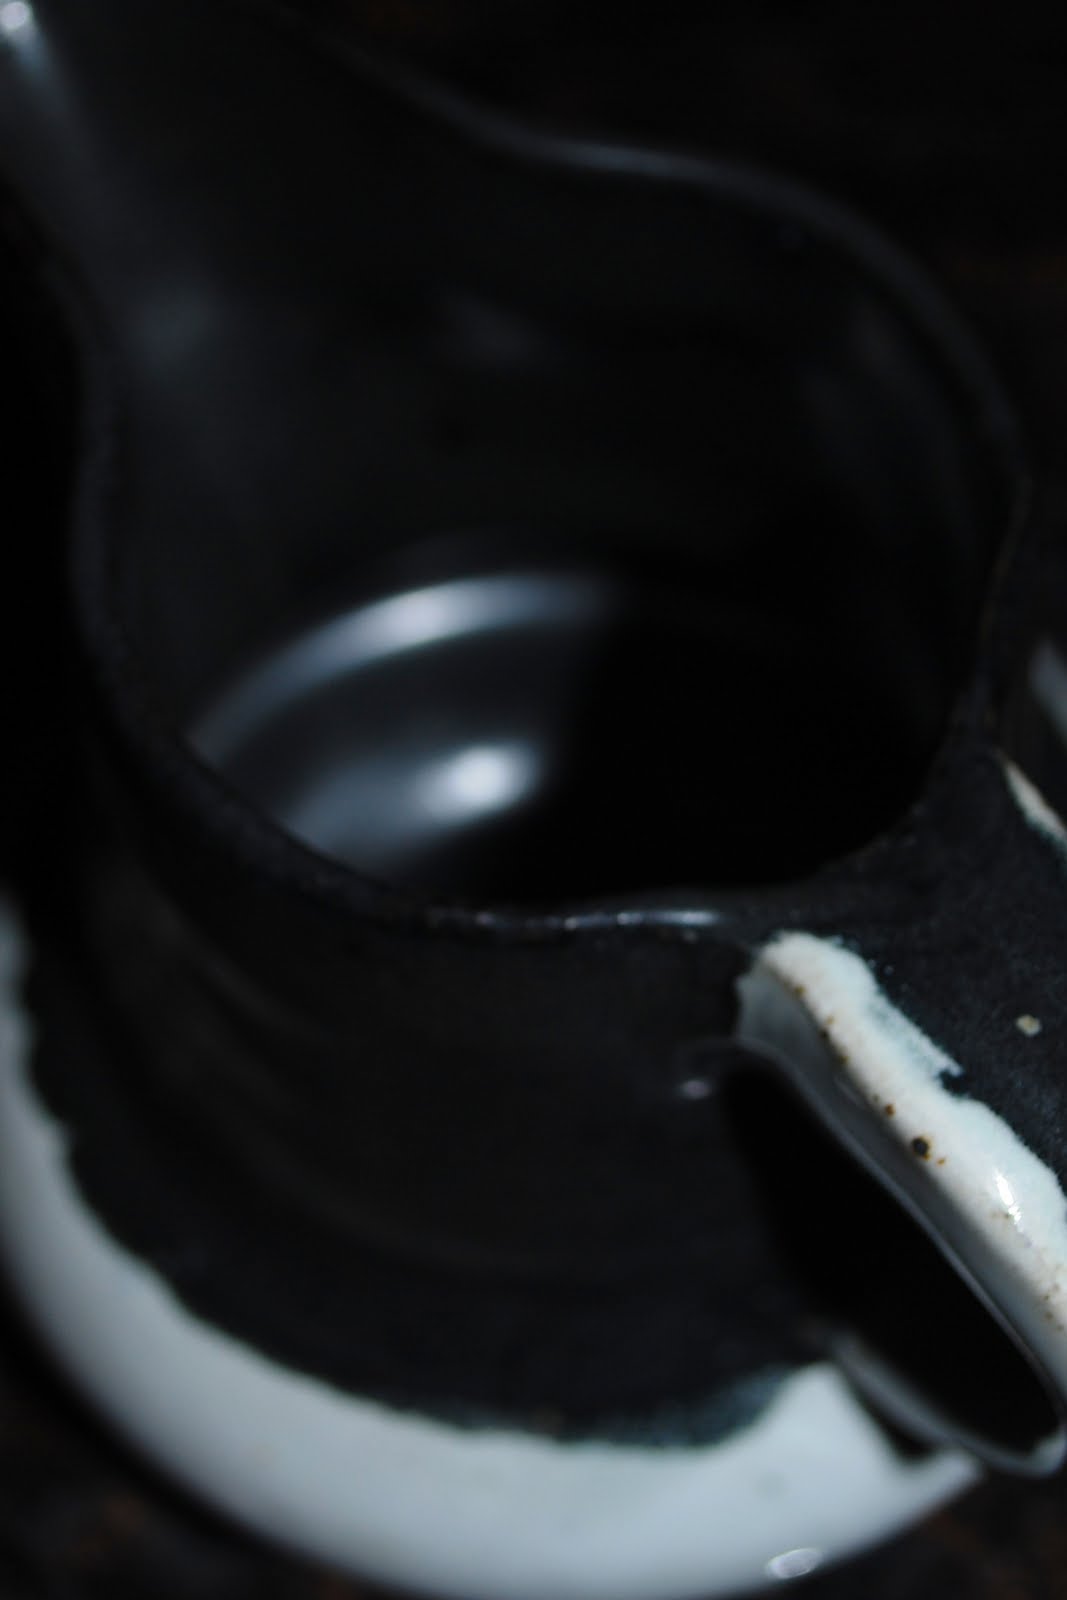
This piece is a cyclinder with 2 handles added. When the piece was still wet, I painted on three bands of Aqua slip. After the piece was fired, I applied wax to the top and bottom band in a sort of modified grecian key symbol. Then I brushed on Waxy White and Antique White in alternating vertical strips on the outside. The inside is just Antique White. I kinda like it -- do you?


The final piece -- another cyclinder with handles. I think you're starting to see a theme by now -- HANDLES -- yes, we just learnt to pull handles. LOL. Anyways -- I call this piece my Fire and Ice piece. This piece took a while to finish. I had to tape the piece in tape and then cut out the flame pattern with an Exacto knife (while trying not to cut myself). Once that was done, I dipped the bottom portion in Iron Red and waited for the glaze to dry. After the glaze dried, I applied a layer of wax to resist the upper glaze color. Once the wax was dry, I took off the tape and painted the top with Josh Blue and then the rim in Waxy White to give a sort of ice/snow effect. Took a really long time but I think it is worth it. I call this piece Fire and Ice -- sort of obvious, don't you think?


That covers the glazing portion of this post. Hopefully next week I'll be able to show you some of the bowls, plates and jugs that I've made.

Sunday, October 18, 2009

Much Delay

Sorry I haven't posted anything in a while -- the kiln schedule is sort of crazy at the studio. There's been a couple of missed firing because there wasn't enough pieces to fire. Anyway, everyone is producing like crazy now so hopefully things will even out a little. I just glazed 7 pieces yesterday, five pieces should be coming out of the bisque kiln today and I have three pieces sitting on the shelf waiting to be bisque fired.

Anyway, the two pieces below are the final of the final from the last term. One is a Jeff Campana inspired piece where I incised (Jeff actually cuts through his pieces) the exterior when the piece was leather hard and then I glazed the piece in Aviva Blue and Josh Blue. I would say it is probably one of my favorite piece.


This last piece is a plate that was thrown on the wheel and then I glazed the outside in Matt Black and the inside with Red Iron and a drizzle of Aviva Blue around the edge.


Ok --that's it then -- no more stuff from the last class. The next time it will be things from the new class and hopefully, you'll see an improvement in the pieces that I make.

Friday, September 18, 2009

The Last Batch

These are the last batch from the last class -- well, almost. I still have two more pieces to glaze -- a plate and a cup. I want to try something fancy with those. The pieces below are done with the white stoneware that I was trying out. I still am not quite sure I like white stoneware for throwing but the glaze looks stunning on it. Maybe I have to try white stoneware again but throw my pieces with thicker walls.


This piece above, I played with the from after I threw it -- collared the neck a little, flared out the lip, etc. I brushed the nooks and cranies with temoku and dipped the whole piece in Red Iron.


The two bowls in the back in above picture is what I am referring to. The while bowl was another white stoneware piece. Before bisque firing, I incised a filigree design on a band arond the bowl. At bisque, I filled in the filigree design with temoku and dipped the piece in Shaner White and Waxy White. The filigree design didn't show up too well and the Shaner White/Waxy White combination did not yield the same result as the last bowl so more experimentation is required.


The second larger bowl is dipped in Celadon and then the rim/lip is dipped again in Coleman Apple Green. I really like these tone-on-tone combination. As you can see, the Coleman Apple Green sort of pooled at the bottom of the bowl in the inside. I think this is quite interesting. Of course, I have to experiment more.


The above three pieces are what I like to call my "Nesting Bowls" -- they do fit in each other. I was trying a wax resist glazing method with limited success. I first dipped the whole piece (all three) in Matt Black. When it is dry, I applied wax to the rim/lip and the base. When the wax resist is dry, I removed the unwaxed area with a damp sponge and the dip the piece in Shaner White. The plan was for the wax to prevent the white from getting into the black part. I think it worked out quite well but I think I have to give the wax more time to set up and try and maybe do a better job at resisting. Also, the black might have ran into the white a litte. Of course -- MORE EXPERIMENTATION!!!!


This was a happy surprise for me. Remember how I said that I thought that Aviva Blue was kinda boring since it is so two dimensional -- rich color with no variation? Well -- SURPRISE!!! I dipped the piece in Shaner White and when that was dry, I used a squirt bottle and squirted Aviva Blue in a sort-of diamond shape around the bowl. I really like the "gentler" Aviva Blue. Got the idea from when I was brushing Aviva Blue to the twisted bowl from an earlier class.

In an attempt to use up all the clay (you can't take it out of the school -- policy), I formed the piece below on a mould. Hand building is really not my thing but in a moment of "weakness" and wanting a bigger piece to show, I did it. Yes, I am weak! Anyway, I also wanted to try one of the "RED" glaze combination -- i.e. glazes that run all over the place and should not really be attempted by newbies. When I did this piece, I put tall feet below the bowl so that it would be allevated above the kiln shelf. Then I try the Temoku/Yellow Salt combination. Check out the running -- now you know why it is a "RED" combination. Love the run.


The Light at the End of the Tunnel

The kitchen is done . . . need I say more?

Saturday, September 5, 2009

More Pottery -- Week 6 Pieces?

I am starting to loose count of what pieces are from which weeks. In any case, I think these are from the same batch and were glazed about two weeks ago. This first one is an attempt at a cyclinder. The cyclindrical shape is there but the base is a little wider than the mouth. Also, I did some intaglio (craving) work on the surface. The piece is glazed with Coleman Apple Green at the bottom, Temoku on top and the lip and the inside is Yellow Salt.


Did another piece in a cup shape that also utilized the intaglio technique. This piece was carved with a lotus pattern. I think I scratched too deep and the piece has a slight crack from the top to the tip of the lotus pattern. Have to experiment some more with this. The piece is glazed with Shaner White in the lotus pattern and on the inside of the vessel and then Temoku on the outside.


The final piece is a bigger version of the bowl I made earlier. The form is the same except it is bigger. I glazed it with Shaner White and . . . no, not Temoku, Waxy White. I really like the effect it has on the piece. See for yourself . . .


I just glazed the Week 7 pieces yesterday. There were 7 pieces in all. 2 more pieces are waiting to be glazed. I could have glazed them last night but it was a quiet night and someone rang the buzzer -- which caused me to jump and dropped the whole piece into the vat of glaze. So, I had to wash it off and let it dry before I can glaze again. You see, when a piece it wet, it doesn't absorb the glaze into the bisque fired body so you have to let the body dry. The Week 8 pieces are waiting to be fired for the first time (bisque firing). Last Sunday was Week 8 so I have two weeks off before the Fall term begins. I'll still be glazing in the interim but no wet work allowed during the break and so, no new pieces. As always -- comments are welcomed.